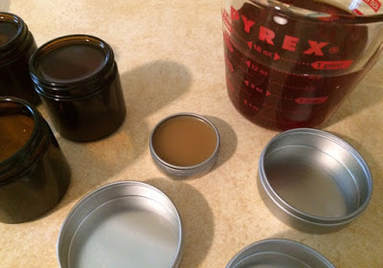
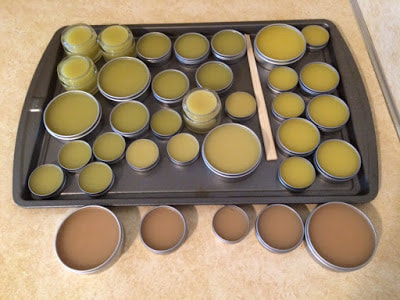
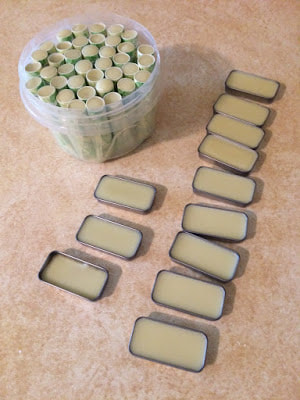
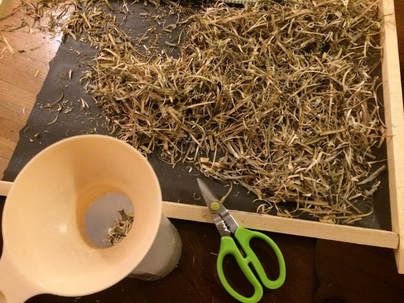
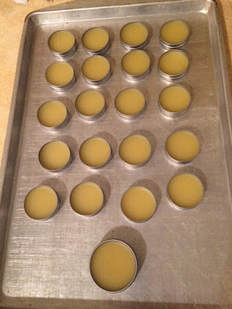
Fabulous Creations, New Items, and Events - oh my!From the archives! Originally posted August 2015. Friends! My little Linden Tree Herbals journey is moving along like a birch bark canoe on a little river after a hard rain! This year my personal goal was to have just one item invented, tested, and ready to sell. Now it is August, and I have dried herbs, seeds, lip and body balms, salves aplenty, infused oils, elixirs, tinctures, and herbal seasonings. In the works but not yet finished testing are three herbal bath soaks, two herbal mouth rinses, and lotion bars. Wow! Part of the reason for all this productivity, aside from the fact that I just really like to invent new herbal goodies, is that I'll be a vendor in the Herbal Marketplace at this year's inaugural Great Lakes Herb Faire, September 11-13 in Chelsea, MI. This event is organized by a handful of local herbalists, including my teacher jim mcdonald, and promises to be an excellent weekend of learning, sharing, and herb-geekery that I am super excited about. More info can be found at the Faire's website, www.greatlakesherbfaire.org. I am especially excited to learn from Leslie Williams (Maine), Leslie Alexander (Pennsylvania), and Linda Conroy (Wisconsin). Then, I received an invitation early this week to be a vendor at the 4th annual Gilded Gear Festival, a fun-looking steampunk gathering hosted by The Rivet Fleet, a group of steampunk folks in and around metro Detroit. This event will be on October 10, at Bloomer Park in Rochester Hills. I am not a steampunk person myself, but am a big fan of the steampunk look. Kind of a mix between Victoriana and Wild West, airships and technology powered by steam. Retro and futuristic at the same time, with some great outfits. There is more information about both these events on the Linden Tree Herbals website (www.lindentreeherbals.com). Depending how these two events go, I may also be at the DIYpsi holiday event on December 12-13 in Ypsilanti. A friend and I went to their summertime show at the Corner Brewery in Ypsi last month, and it was excellent. I noted that they could use more local vendors...like me, perhaps! Here are a few more of the things I've been cooking up lately: Oh, how I love crafting up new herbal goodness!
1 Comment
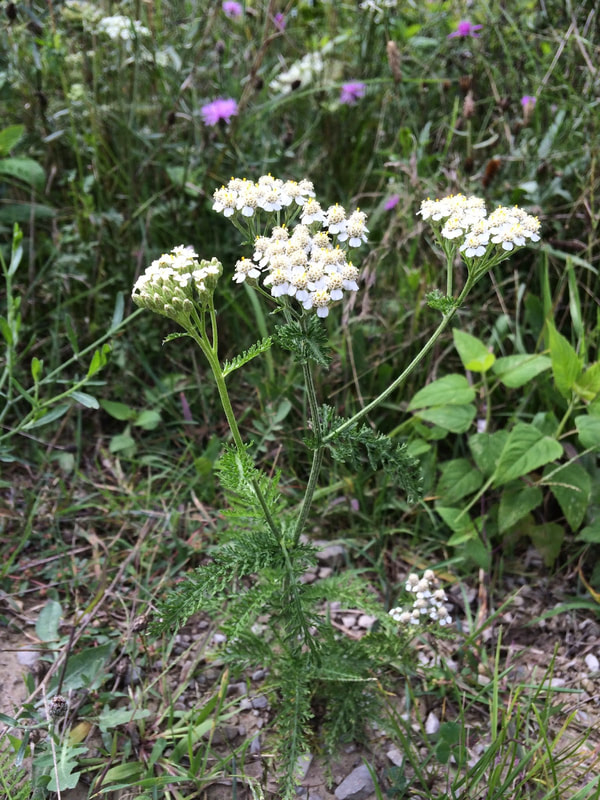
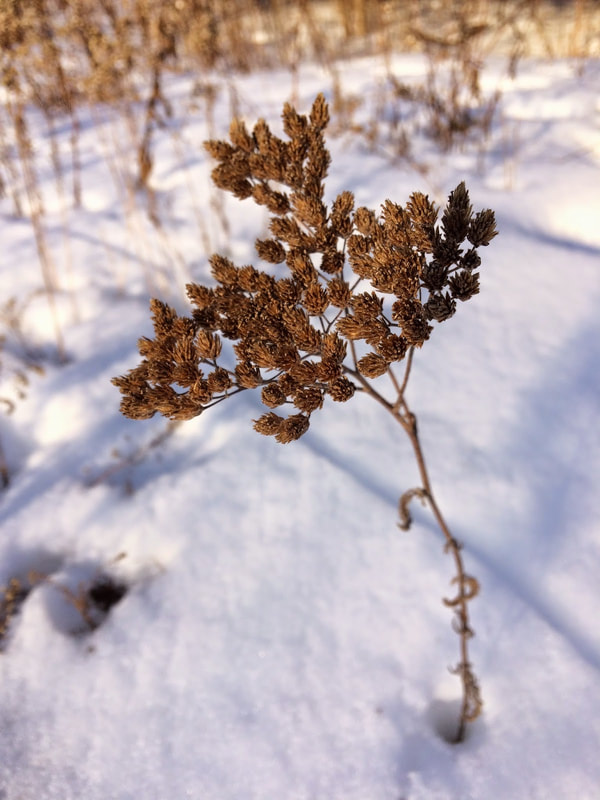
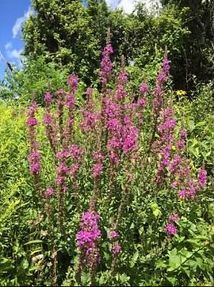
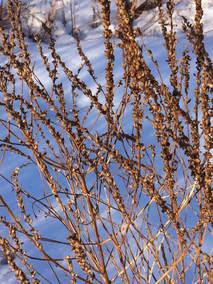
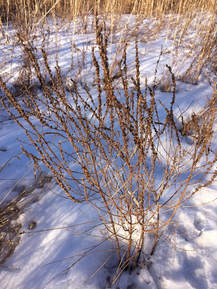
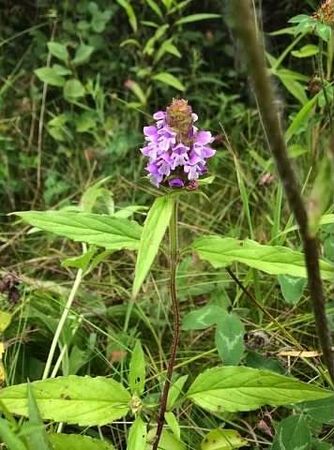
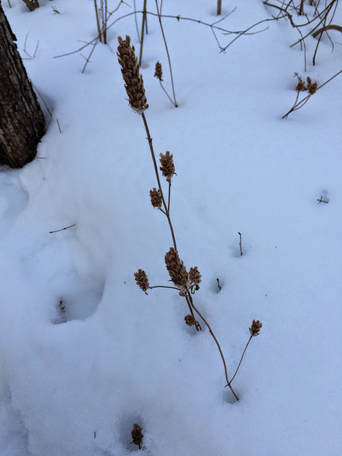
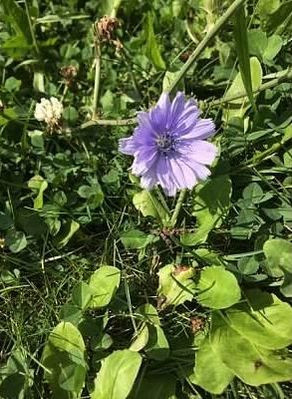
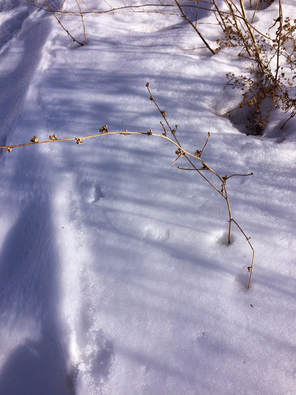
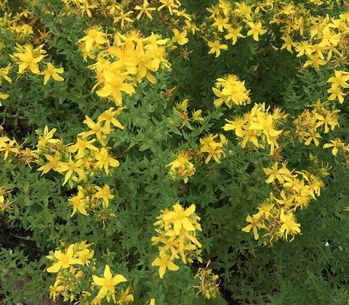
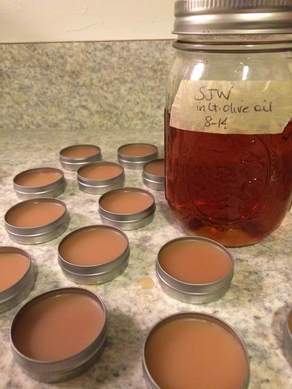
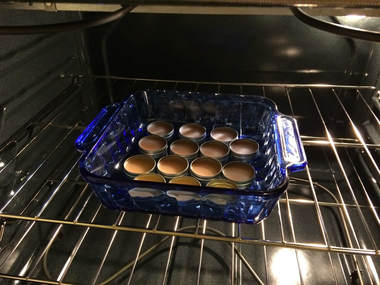
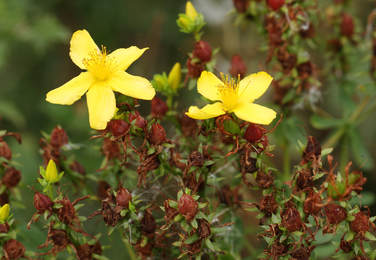
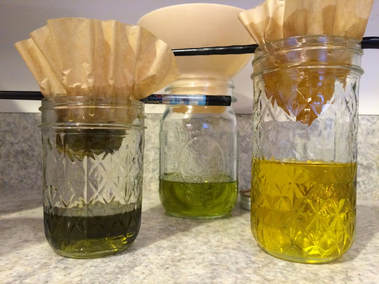
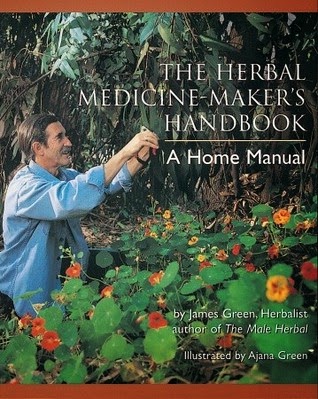
Winter BotanyFrom the archives! Originally posted March 2015. The weather was glorious last weekend. Above freezing and sunny for the first time in I don't know how long. I put on my outdoorsy gear and spent both Saturday and Sunday afternoon at two of my favorite Ann Arbor area parks. There was still plenty of snow on the ground - it is March in Michigan, after all. It's not uncommon for us to have large snowfalls as late as April 12, so I don't really consider winter to be over until at least mid-April. This past weekend was a preview of spring, and it was lovely to get outside. I picked up a new book in the fall, called Winter Weed Finder: A Guide to Dry Plants In Winter, by Dorcas S. Miller. It is a tiny book, small enough to fit in a pocket...and easily lost on a bookshelf! For whatever reason, it had not previously occurred to me that you could locate plants in the wintertime by looking at their dry stalks, flowers, leaf remnants etc. Think of how useful it could be to recognize plants in wintertime, against the stark snowy landscape, and mark their locations in your mind or on your map for further investigation during the growing season. Take Yarrow (Achillea millefolium), for example. This plant likes to grow in sunny places - fields, edges of paths, grassy spaces of many kinds. I have my Yarrow harvesting spots, where it grows heartily and enthusiastically. It blends in easily with other plants, and is generally grows about knee-high. I do not typically find stands of Yarrow, but rather many individual plants scattered among the St. John's Wort, Goldenrod, Teasel, Black Raspberry, Buckthorn, and various grasses. In other words, it can be difficult to know how much Yarrow is in an area, because there are so many other plants growing there too. In the winter though...wow! The herby, grassy greenness dies away, leaving dry stalks and canes. I thought it was super interesting to see the plants' winter selves. It is like discovering your friend has a cool and interesting hobby that you never knew about. Knowing the different stages and appearances of a plant can deepen your relationship with it. It's a fun way to amaze your friends, too! Here are a few Summer vs. Winter plants:I Yarrow (Achillea millefolium) Purple Loosestrife (Lythrum salicaria): Self Heal (Prunella vulgaris): Chicory (Cichorium intybus): As you can see, the more woodsy plants retain some characteristics throughout the winter; certainly enough to identify them if you know what to look for. I am having so much fun finding the wintertime forms of my favorite plants. I'll probably head out again this weekend, tromping around on and off trail again. It's supposed to be sunny and about 50 degrees. At this rate, everything should be green again in no time! This Year's Experiment, and From the archives! Originally posted December 2014. St. John's Wort and I have a rocky history. For years I have stayed away from it, afraid of destabilizing the physical and mental balance I've kept for well over 10 years now. Retrospectively, I credit my unpleasant experiences to a mis-application of St. John's Wort in pill form (thankfully short-lived) by someone who did not really have all the facts needed to suggest this plant as part of a treatment protocol. You may have heard this before, but I will say it here: relying on marketing trends for impartial, complete information is not an effective way to make decisions for yourself or for others. Marketing, by definition, is information communicated expressly for the purpose of selling something. Opinions and conclusions formed solely from this kind of biased information can have such a wide range of effects - not all of them good. My reactions to St. John's Wort were, at best, upredictable. These days, now that I know more about plant medicine in general and St. John's Wort in specific, I count this plant as a good ally. It's a pretty little plant with bright yellow flowers. I find it growing in sunny fields. It seems to like field edges, along paths and little clearings where it can get plenty of sunshine. St. John's Wort is more widely known for its nervine actions, and though I acknowledge its value in this arena, I have very little experience using it this way. In my first year of herb school, I learned how to use St. John's Wort topically, as an infused oil or salve. St. John's Wort is specific for nerve and muscle pain in general and sciatica in particular. As a person who spends 8+ hours a day at a desk, I have come to have great respect for the sunny, warming, and soothing topical applications of this little weed. I have heard and read that the flowers are the only part of the plant that should be gathered, and only while they're flowering. I've also read that they should be gathered only under full sunshine. The fun thing about herbalists is that we all have different ideas of what works and why. Partly because I learned from jim mcdonald, and partly because it is my nature, I like to experiment. I also don't like absolutes that declare there is only one way to do things. When I read "St. John's Wort only works if you use the flowers gathered midday in full sun and full flower"...well, that makes me want to see what happens when I pick flowers in the evening, or gather some on a cloudy day, or (!) infuse flowers that are spent and/or gone to seed. This year I caught my first harvest of St. John's Wort in full sunny flower, and put it in olive oil not an hour after I picked it. Super fresh, full bloom, maybe even during the day when it was sunny out. Unfortunately I don't have pictures to prove this. You'll just have to trust me. This batch was about a cup and a half of oil, plenty for my own use over the next year or more. After bringing the flowers home and picking through them to make sure I didn't infuse any little insects too, I dropped them into a glass canning jar and poured in enough olive oil to cover the flowers, plus a little more in case the flowers absorbed more oil than I expected. (Side note: I like to use light olive oil because the color and scent changes dramatically depending on the plant that is infused.) You want to keep the plant material completely covered by the oil, to lessen the chances of spoilage. Also, when infusing fresh plants, you don't want your container airtight - at least not for the first week or so. Cover the top with paper towel and a canning ring or rubber band, so that moisture can escape. Typically when infusing plants in oil, it is best to put them in a warm (not hot) location, out of the sun, for 4-6 weeks. St. John's Wort is an exception - it prefers to infuse in the warm sunshine. The sun-warmed oil extracts lots of color and good aromatics from the flowers. You know you have good St. John's Wort oil when it turns a deep cranberry color and has that distinct St. John's Wort aroma. If you pick your own flowers to infuse, you'll know what I mean. I think it smells savory and...well, kind of meaty. Initially I found this to be off-putting, but now that I associate the St. John's Wort aroma with the sensation of waking up in the morning without a backache, I have grown to really like it. After infusing for 6 weeks or more, strain out the plant material and store in a cool place out of direct light. You can use this lovely oil by itself, or use it to make salves, balms, creams, and other topical preparations. I would not ingest this oil, even if you think it smells delicious, simply because I think its topical uses are so excellent that I feel it would be wasted in any other way. If you want to use St. John's Wort internally, there are more effective ways for sure. I made up some salve using one of my oil infusions this past weekend: Turning St. John's Wort infused oil into salve is really easy. All you need is the oil and some beeswax, which I often get from local beekeepers at the farmer's market. If they don't have beeswax blocks, I often come home with beeswax candles and chop them up. You can buy beeswax online too, if that's what you want to do. Melt the beeswax in a double boiler on low heat, about a teaspoon and a half beeswax to one cup oil. James Green, in his book The Herbal Medicine Maker's Handbook, says one ounce beeswax per cup of infused oil, but I find that makes my salve harder than I prefer. I like my salve to be a little on the oily side, especially for St. John's Wort, because I like to massage it in to my sore muscles before going to sleep. Oil is so much easier to massage with than wax! I might also apply St John's Wort salve to scratches, bites or small cuts for its wound-healing properties and for this purpose might make a slightly harder salve by adding more beeswax. Stir up your salve ingredients as they are melting, to make sure the beeswax melts completely and blends with the oil. Chopsticks work really well for stirring, but you can use a knife or whatever you want. You may want to test your salve for consistency/hardness before pouring it into containers. An easy way to do this is to drop a little of the melted salve mixture on a cold plate and pop into the freezer for a moment. This will cool and harden it quickly, so you can do a test application of cool/room temperature salve on your skin to make sure it's the way you like it. When you feel your salve is ready, remove from heat and pour into containers of your choice. Set aside, uncovered, for..oh, I don't know, overnight maybe. Long enough to cool completely and harden. If you have curious pets or children, you may want to transfer your open salve containers onto a plate, cookie sheet, pie pan or similar and store in a cool, out of the way place. I've taken to storing mine in the cool oven overnight, sometimes with the door ajar. Make sure you don't turn the oven on before removing your salve! This Year's Experiment Remember what I said earlier about absolutes, and The Best Way to Pick St. John's Wort, as defined by people other than me? Here it is again: "St. John's Wort only works if you use the flowers gathered midday in full sun and full flower." Partly because I like to experiment, and partly because I realized near the end of the St. John's Wort season that this was the year to start offering my herbal creations to folks outside my immediate family, I decided to see what would happen if I harvested and infused recently spent flowers and seed pods. I was curious to see how the resulting oil would compare with that made from fresh flowers. My teacher jim mcdonald often says that the important thing about aromatic plants is that they SMELL aromatic, and that the most fragrant specimens are the ones to use for good medicine. For example, if you needed yarrow or wild bee balm but it is the middle of autumn and the only plants you can find are dried and brown, pick a leaf/flower/stem and crush it in your fingers. If you can smell it (if it smells aromatic), go ahead and try it! It might not be the strongest preparation, but it could certainly be effective. I've often thought that I would rather have a mild or even weak plant preparation, rather than none at all. With this thought in mind, I came home one day with a small bagful of sticky, resinous St. John's Wort flowers and seed pods that looked something like this when I picked them: It's my habit to wildcraft from early afternoon to evening, as I like to avoid the heat of midsummer but I am definitely not a morning person. This batch was picked on a warm August evening, about an hour from sunset. I made sure to pick the spent flowers and seed pods that had the distinctive St. John's Wort aroma, the same as the fresh flowers do. Some of the plants that had gone entirely to seed were even more resinous and sticky than some with fresh, bright yellow flowers. I thought that was a good reminder that plants are individuals too, with constituents that can vary depending on the individual plant, the area in which it is growing, the weather, the season, etc. As with previous batches, I picked through the flowers and seed pods, put them in a glass canning jar, and added olive oil. I kept this jar in the warm sunshine routine along with my all-fresh-flower batch of oil. My first observation was that the experimental batch seemed to need a longer time to get going. It took weeks before the oil was more than lightly pinkish-red in color. This past summer was much cooler than usual, and I was infusing later in the season. I had nothing to lose except about a cup of olive oil, so I diligently put the experimental jar in as much sunshine I could find, for weeks and weeks. I often wondered what the mailperson thought of the oil-filled jars lined up on the concrete sill below our mailbox. It makes a great shelf for catching the sun. I strained and pressed the first batch of St. John's Wort oil in late August. It had been infusing for 6-8 weeks and though I didn't think any harm would come from leaving the flowers in, it's difficult to actually use oils or make salves if you have plant material in the way. My second, experimental batch of St. John's Wort oil was still going strong at this point, and I didn't feel it was finished infusing so I decided to keep it on sunshine rotation for another 3-4 weeks. For straining oils, I often use a small strainer, canning funnel and cheesecloth or a coffee filter. Chopsticks come in handy for this part too, especially if your plant material is small and light, or all your funnels/strainers are in use already. I've recently invented a chopstick-and-coffee-filter funnel that seems to work fairly well. The picture below shows some of the different color results you can get, based on the plant used for your oil infusion. In late September, as the weather turned chillier and autumn set in, bringing cloudy days and rain, I took another look at my experimental St. John's Wort oil. By then, it had turned a nice cranberry color that hadn't deepened with extra time in the sun, so I decided to press it. I hadn't touched it much in weeks, other than to move the jar from one patch of sunshine to another, giving a gentle shake every so often. I am happy to report that when I unscrewed the jar and upended the whole thing into a strainer, I could smell a strong, sunny St. John's Wort aroma. All appeared to be normal! Appearance and scent of the spent flower and seed pod batch seem to be the same as the batch made with sunny, peak-blooming flowers. This is a nice, hopeful beginning to my experiment.
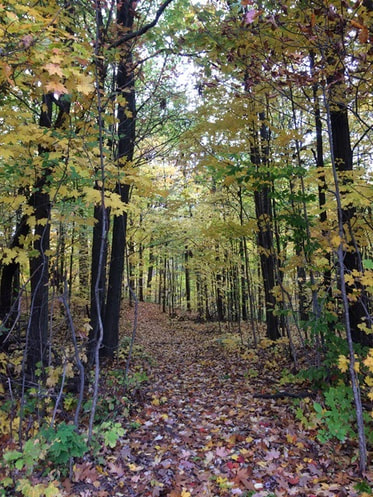
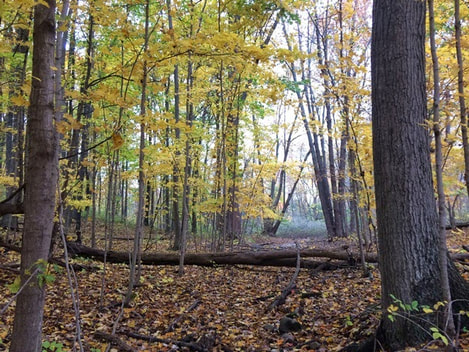
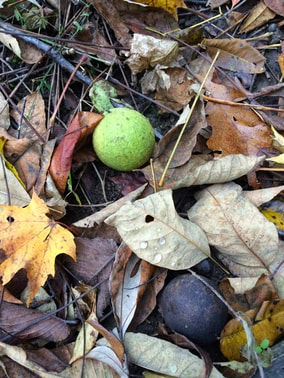
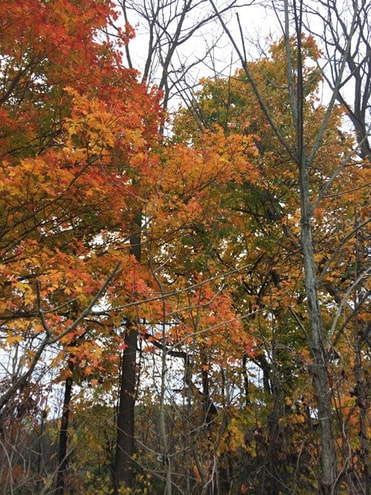
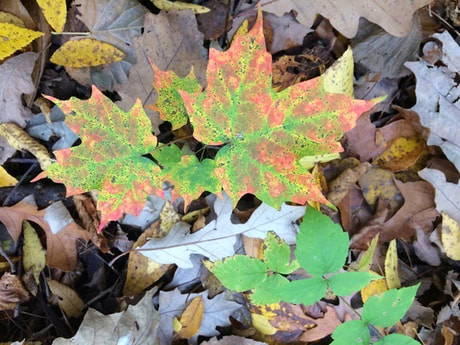
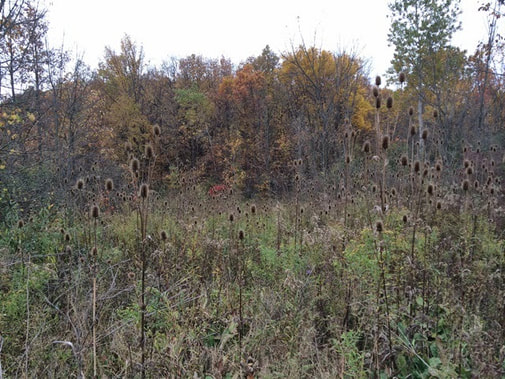
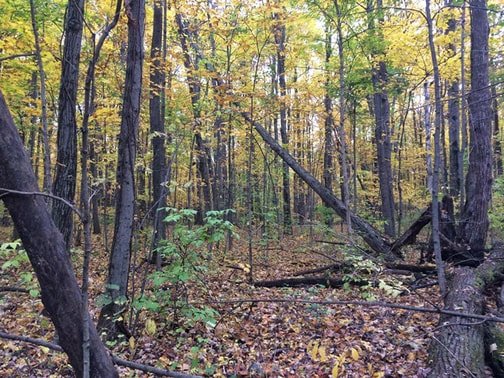
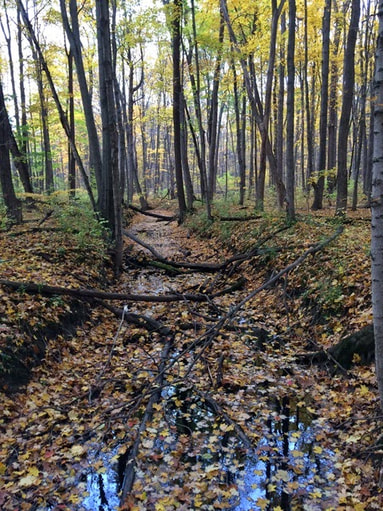
Further observations, tests and conclusions are needed of course, and this winter season I hope to get plenty of feedback from those lucky people who received some of my St. John's Wort salve for the holidays. Merry holidays to all, and to all a good night! Autumn Woods WalkFrom the archives! Originally posted late October 2014. As of Friday afternoon, I was looking at a socially committed weekend filled with friends, kids, and family. I'd planned to fit in some book reading, tea drinking, kitty sitting quiet time too, in an attempt to even myself out. I did not officially plan to spend time in the fields and woods... Let's go for a walk! We'll enter here, into a softly glowing maple woods: Is this really a path? (Sure, why not!) What a find! Black walnuts, freshly fallen (top) and veteran of the forest floor (bottom): More beautiful fall color at the wood's edge: Up close and personal with multicolored maples: Teasel standing tall in the autumn landscape: Back into the woods at my favorite spot along this walk: Crossing the bridge: This last picture, I have titled 'Standing on the Elf Bridge.' There's something about standing here, crossing the wooden plank bridge over this small, deep stream, that makes me expect to see Frodo somewhere. The stream is perhaps eight feet wide, and the bridge a few feet longer. The bridge sits about two and a half feet over the water - the streambed is surprisingly deep. The water moves slowly, its surface covered with fallen leaves. Up the rise on the other side of the bank, the trail winds through the softly glowing forest. I have my eye out for bright red Spicebush berries, though it is late in the season. Out of the corner of my eye I see something, but when I look straight on, there is nothing there. Not even a squirrel. Must be a little elfin boy, peeking around a tree at me and smiling, like we are playing hide and seek. I smile back, and keep walking. Thoughts on SustainabilityFrom the archives! Originally posted October 2014.
Thoughts on Sustainability... or, Who Made That and What Happens When I'm Done With It? Every day I discover that creating a business is so much more involved than I think...and I'm not just talking the legal, tax and regulatory whatnot, which can of course be very confusing. Here are just some of the things I've been working through lately:
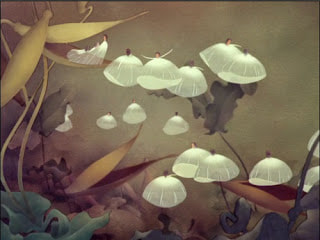
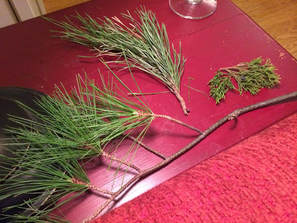
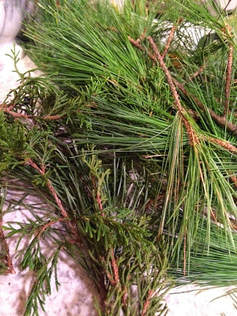
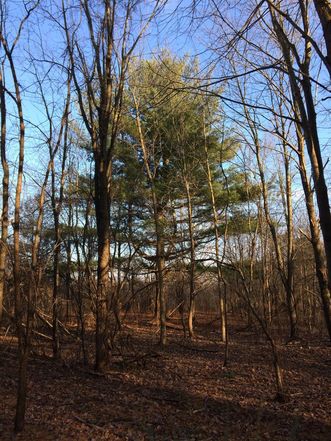
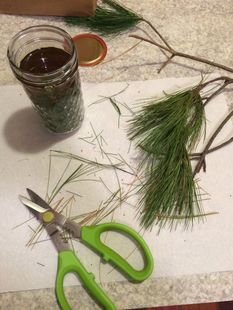
After spending what feels like an inordinate amount of time on topics such as How Labels Are Made, and Where Ink Comes From, I've decided to do some experimenting. I've been photo-documenting as I go, and will share what works (and what doesn't). Ideas, suggestions and guidance are welcome! A Gift of Pine (and some red cedar)From the archives! Originally posted November 2014. Fall time is root time. As the weather cools, field and woodland plants lose their green colors, exchanging them for a multitude of brown, tan, neutral shades. The energies of many plants turn downwards and inwards, back to their roots, in preparation for the dormancy of wintertime. Other plants brown and die, having completed their life cycle. Seeds dance in the air from milkweed pods and goldenrod fluff, catching on my coat as I walk by. On a windy fall day I help the milkweed along, pulling a handful of fluffy seeds from the dry pods and flinging them exuberantly into the breeze. They dance lightly on the wind and settle in the plants nearby. I always think of Fantasia when I do this, like I am one of the fairies in the Waltz of the Flowers: Last weekend I set out in search of mullein and teasel roots specifically, with an open mind to whatever else I might find that wanted to come home with me. Oftentimes I will have a goal in mind when I go wildcrafting, with a plant or several that I am looking for. I generally find what I am looking for, as well as plenty of plant friends I was not seeking! This particular trip saw me arrive home with mullein root and leaf, teasel root and leaf, plantain leaf, a few handfuls of teensy wild rose hips, two burdock roots, and - the totally unplanned pleasant surprise - a bagful of branches and needles from three types of conifer. In the field and without my tree books, I guessed pine and eastern red cedar. Later at home, using live specimens and photos I'd taken of the trees, I identified them as White Pine, Red Pine, and Eastern Red Cedar (shown left to right in the picture below). I will confess right now - I don't know as much about trees as I do about plants. I am not confident that my harvesting will not be painful for the tree, or difficult to recover from. I also am made hesitant by their long lives and slow growing times. I worry that I will do them damage. That said, I am certain that trees make medicine just as vital as the plants I know, and I am eager to learn about how to use tree medicine. In this particular wildcrafting spot, there is the occasional conifer to be found amongst the hardwoods and fields. These trees are often large, old, tall, and many-branched. They are surrounded by a carpet of shed needles that softens the space and makes me feel quiet and reverent. A cone of silence, if you will. I stepped off the path to vist one of these friendly giants. This particular tree's lowest branches began growing more than 5 feet off the ground, higher than I could reach. The branches extended down and out, so that I had to duck under the needles at the farthest ends. No one wants a pine needle in the eye! As I slowly walked around the base of the tree, admiring, I thought of my tree medicine conundrum. How to learn about trees and make medicine without hurting the tree? Ah well, I thought. Perhaps tree medicine is part of my future, once I learn more about them and "how to do it right." I thanked the tree for our nice quiet visit and turned to head back to the path when I noticed a small branch of bright green needles, barely hanging on to the main branch by a thin strip of bark. It must have broken in the 20+mph autumn winds the day before. Here was an answer to my internal question! A recently broken branch, still alive and green with piney goodness, right there in front of me. I picked it. This little branch was really more of a twig, about a foot long with three bunches of bright green needles. I put it in my bag, thinking of the lovely experimental medicine to be made with pine and honey. Then I had another thought...if the wind had broken this branch, might there be more? Once I started to pay attention I saw several vital-looking, green twigs and branches waiting quietly to be noticed. I put some of these in my bag, too. What a good solution! Provided the bits and pieces shed from the tree are still as green and vital as they would be on the tree, I have no problem using them for my experimental medicine. In other words, since I am learning about pine, and I will primarily be the one sampling and testing medicine made from this pine, I have no qualms about using the windfall I find on and near the tree. I may revise this opinion and harvesting method in future, or when I am making medicine for others to use, but for me and for now, it is an excellent solution. Once home and properly fed, I identified the conifers that came home with me (see picture above, of samples on my little red table). Here's another picture of them all together: Once ID was confirmed and facts checked, I made medicine! Here's a short list of what I made:
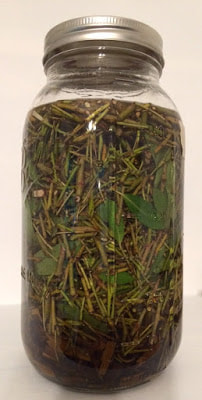
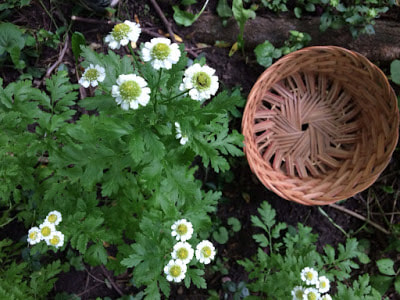
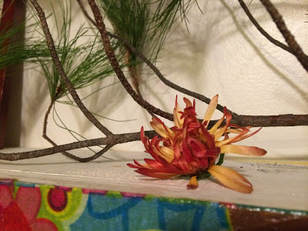
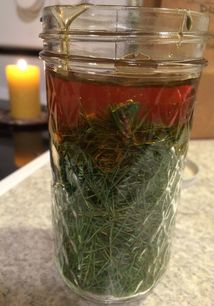
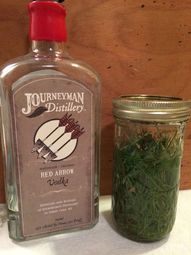
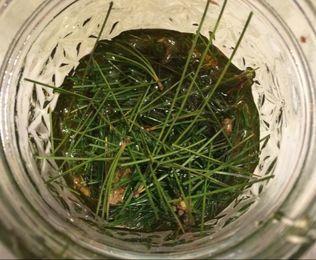
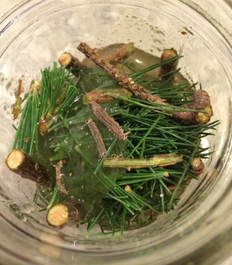
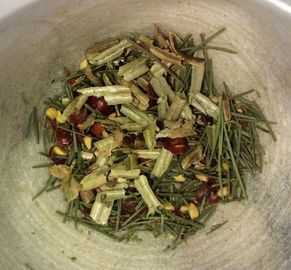
-White Pine Elixir -White Pine infused honey I'm also drying some branches for making tea, and I have a pine oil/salve in mind too. Details and pictures will follow in a separate post, because I'm feeling a bit long-winded with this one. I'll leave you with a final picture, of my lone garden-grown calendula flower harvest, drying alongside a white pine branch in my kitchen. Pine Experiments - Elixir, Honey, and TeaFrom the archives! Originally posted February 2015. White Pine is a wonderfully aromatic, resinous, cooling, and energizing tree. Pine needles are full of vitamin C. They combine well with other herbs, as well as making a delicious tea all on their own. Pine can be used both internally and externally. Energetically, Pine is cooling and stimulating. It is often used for afflictions of the respiratory system, and can be a valued expectorant. Elixir I should probably preface this by saying that I've not yet sampled my white pine elixir, so I don't have any commentary to make on how it's turned out. It is still in the herb cabinet, in its jar, just waiting for the right time. For an energetically cold and dry person like me, I probably will need to wait for a summer cold to really test it out. An elixir is an herbal preparation consisting of plant material, honey/maple syrup/molasses, and alcohol. The plant material is extracted in both the honey and the alcohol, and both assist in preservation and shelf-life too. Best of all - elixirs are delicious! Something like a spoonful of sugar to help the medicine go down, as Mary Poppins would say. I think of an elixir as a sweet tincture. One of the best things about elixirs as an herbal medicine format (I think, anyway) is that I can pop a dropperful right on my tongue without the alcohol "burn" that I often feel from tinctures. In an elixir, not only is the alcohol content lower by ratio, it is also moderated by the honey, which smoothes out the taste. You can make lots of plants/fruits into elixirs - right now I have separate elixirs of peppermint, wild cherry, elderberry, blackberry, and of course white pine - the subject of this post. Here's how I make my elixirs: 1. In a mason jar, fill 2/3 of the jar with your main ingredient. Be sure to chop the plant material into small pieces or crush for best extraction. The more surface area to work with, the more is extracted from the plant. 2. Add enough honey to cover the plant material, and stir until it's all well coated. Add more honey, about an inch above the plant material in the jar. 3. Top off with alcohol of your choice (I used Journeyman's organic Michigan vodka for this batch), and stir again, slowly. As the honey is thick and the alcohol is not, it can splash out of the jar much too easily, so stir gently until the alcohol is incorporated into the honey/plant mixture. 4. Cap securely and store in a cool place for at least 4-6 weeks. Every so often, give the jar a good shake to mix it all up. 5. Once you think it's ready, strain out the plant material and store in a cool place. How much? I think dosage of white pine elixir would depend on what you're using it for, and how severe your condition is. As a preventative pick-me-up, say, I would think a couple drops to a dropperful, up to 3 times a day. In the grips of a stubborn illness with congested, damp mucous, I might say 3-15 drops every couple hours. Keep in mind that pine can be drying, so if your tissues begin to feel too dried-out, decrease your dosage, add teas of moistening herbs, or stop altogether. Consult your friendly neighborhood herbalist if you have any questions! Infused Honey I adore honey. I don't know how I would ever live without it. I am so very grateful to all the cute little fuzzy bees who spend their dancing, buzzing, industrious lives making the honey, beeswax, propolis, and other wonderful things we herbalists use. One delicious way to use plants in your daily life is to infuse them in honey. Infused honey can be enjoyed by itself, or used to sweeten tea and foods. If you have time, infused honey is very easy to make. Here's how I do it: 1. Start by cutting or crushing your plant material into small pieces. Put it all in a mason jar. 2. Pour honey onto the plant material. Allow the honey to settle into all the little nooks and pockets. 3. Poke gently (I use a chopstick) to get out air pockets and evenly distribute honey throughout the plant material. 4. Add more honey, to about an inch above the plant material. You want to at least cover the plant material completely. 5. Cap securely and store in a warm place out of the sun for 4-6 weeks. I find that wintertime in Michigan is a great time to infuse honey. The plants extract wonderfully well when I place the jars in paper bags just to the side of one of our half-closed heat registers. The jars are exposed to a gentle low heat multiple times per day, using heat that would otherwise be wasted on an empty room. Though you can also infuse by heating the honey and plant material together in a double boiler or crockpot at a very low temperature for at least several hours, this is not my method. I am a manual style herbalist who prefers to let my concoctions prepare themselves with little or no help from modern conveniences, when it is practical. For example, I chop and cut my plant materials by hand. I infuse oils and honeys in heat provided by the sun (or the heat vents, which I am using anyway). I really like the physicality of working with the plants to make medicine. I have tasted this batch of infused white pine honey and can proudly say it is delicious. Even I was surprised by how yummy it is. I like it best all by itself, on small espresso spoons! Tea In my opinion, water-based infusions (aka teas or tisanes) are the best way to enjoy plants. All you need is an herb and some water. You don't even necessarily need hot water, as many herbs extract well in cool water. The nice thing about herbal tea is that it's practically impossible to mess up. There are so many options and combinations of plants to make tea with, and you can make your tea as diluted or as concentrated as you'd like. Sweetened or not, iced or hot, the possibilities feel endless! For herbal teas (not nourishing infusions, which I will cover at some other time) I prefer using clean water just off the boil, and generally one-two teaspoons of plant material per cup or mug of water. I prefer dried herbs for tea, but you can use fresh ones if that is what you have. Put your tea herbs into an infuser or reusable tea bag, pour the water, and steep for about 15 minutes, covered. Strain and enjoy. I've been drinking lots of tea this winter, as per usual, and by February have felt the need for a little variety. I invented this blend the other day, starting with a thought of my base herb (white pine) and then mentally rifling through my herb cabinets, thinking what plants and combinations might taste nice. I settled on wild rose hips and evening primrose to round out and sweeten the resinous pine. It ended up being about 3 parts pine to one part each of rose hip and evening primrose. It looked like this in my mortar, all mixed up: This tea smelled nicely piney while steeping, and when I tasted it, I was so pleasantly surprised! Rich and yet gentle with pine, smoothed out by the sweetness of rose hips and evening primrose. I decided to call this blend Sweet Pine Tea, because that is what it is.
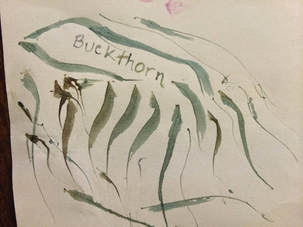
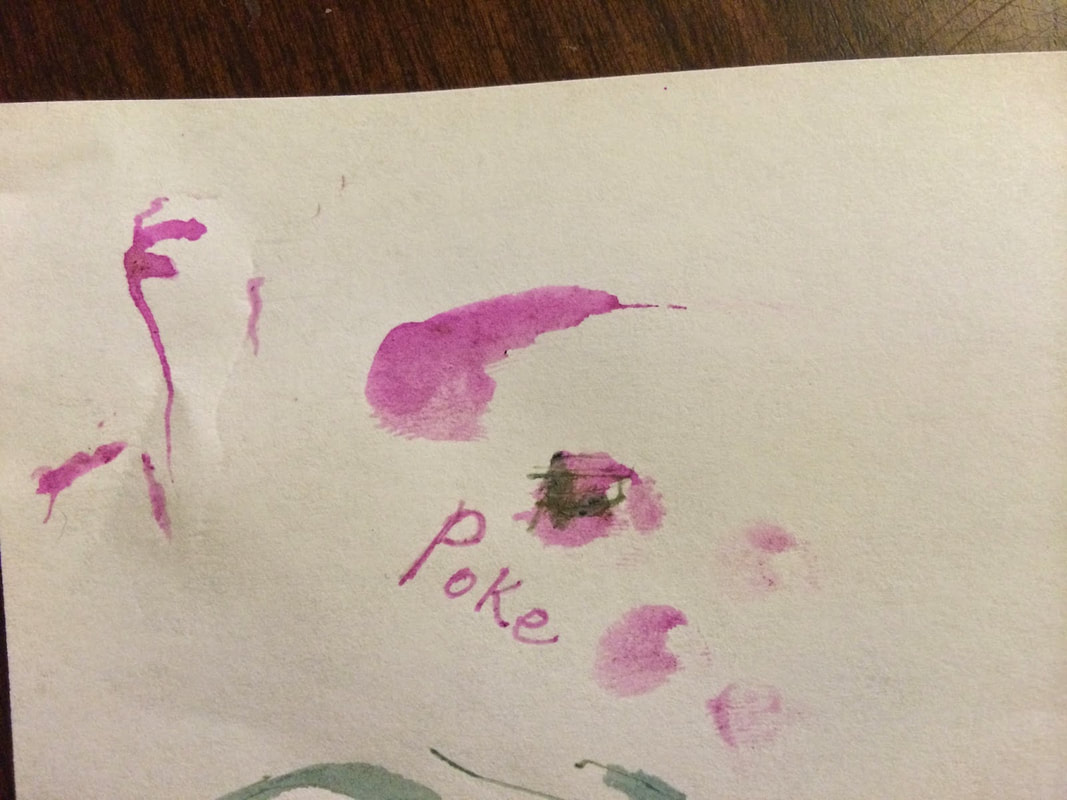
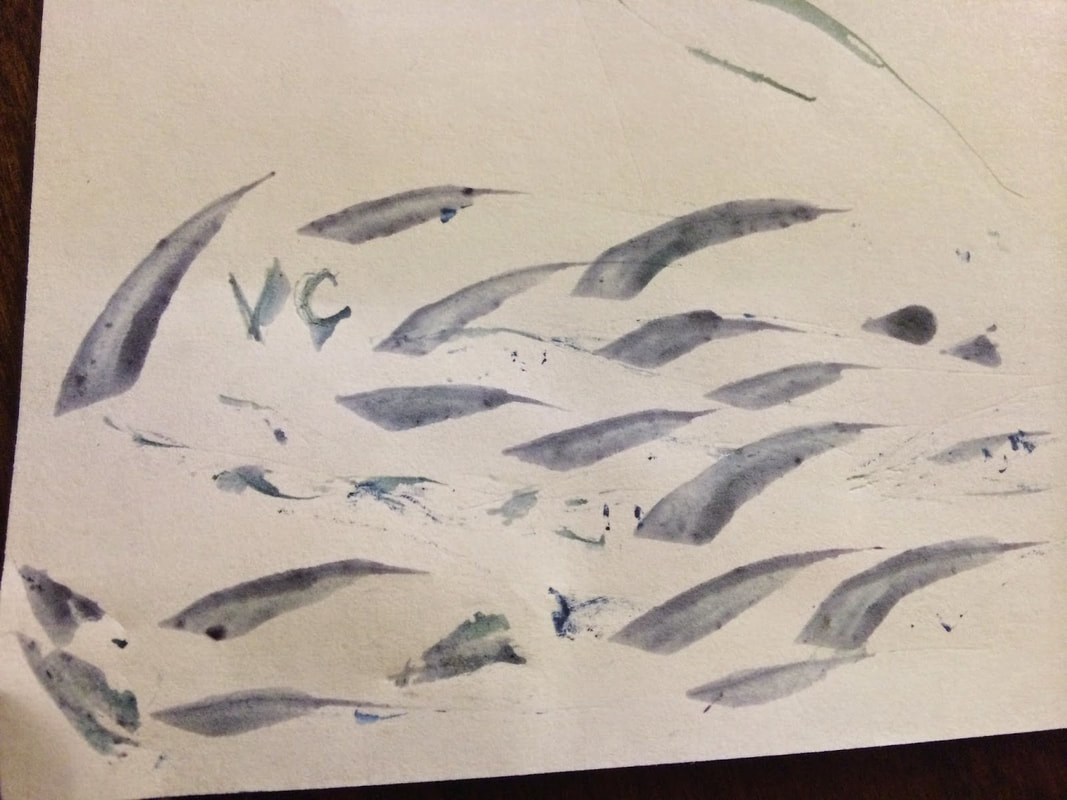
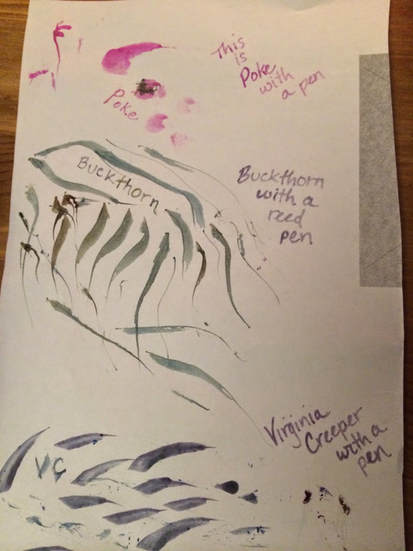
This tea can be enjoyed as an everyday tasty beverage, or multiple times a day (sweetened with pine-infused honey!) if you are feeling under the weather or have a persistent damp cough to be addressed. As always, consult your herbalist if you have questions. Berry Ink and Reed PensFrom the archives! Originally posted October 2014. In keeping with my sustainable mindset and enjoyment in discovering new uses for overlooked materials, I've been experimenting with inks and pens. Berry inks and reed pens, that is! After some extensive internet research, I discovered several helpful resources on making ink from natural materials, and creating writing utensils from renewable resources like bamboo, cattail and phragmites reeds, bird feathers, and such. I don't often find feathers large enough to use as quill pens. I think I've seen just one in the last year's ramblings. I dislike the idea of purchasing bird feathers, since I don't know where the feathers came from or if the bird gave them up willingly. I do see plenty of reeds, canes and sticks on my walks, especially at this time of year when everything is dying back and drying out for the wintertime. Berry Inks - round 1 One day last week I hopped off the bus early so I could walk through Miller Nature Area. Ann Arbor has so many parks, nature areas and green spaces that it takes a while to visit them all. I'd not been to Miller Nature Area yet. Shortly after boarding at the bus terminal - in the correct area, I'll add for the record - I discovered I'd chased after and boarded the incorrect bus, taking me a little farther north than usual. Since I would be nearby, I decided to have a nature area adventure on my way home. Miller Nature Area is a nice little woodsy, overgrown space in the middle of a neighborhood, with small trails up, down, and around. More information and a map can be found here: Miller Nature Area . On the walk home I found poke berries, buckthorn berries, virginia creeper berries, walnut hulls, and hickory nut shells. I brought a little bit of everything home to experiment with ink-making. The first stage of berry ink making was super simple. I separated the berries into small dishes, mashed them with the back of a spoon, and there you have it. I have two cartridge ink pens that I experimented with after making the ink but...well, these pens don't work very well with dip ink. I got more results by dunking the pen nib and using that to paint calligraphy-style shapes on the page. I was able to write with this pen, but the nib held very little ink and had to be dipped again for each letter. Very time-consuming and not ideal for what I have in mind. *It should be noted that this method of ink-making is super simple but spoils easily. I had vinegar-smelling poke, buckthorn and virginia creeper within two days (sealed but unrefrigerated). Ultimately I'd like to figure out how to make a more stable ink, but as this is round 1 of many, two days of writable ink is pretty cool in my book. Reed Ink Pens - round 1 This past Saturday I went out to Clarkston for a jim mcdonald walk/talk about apple and its various uses in delicious healing. Standing underneath a crabapple tree after tasting its SUPER astringent, puckery apples, I looked down and saw a broken, toasty brown goldenrod cane, bent over near my feet. About a foot long, a quarter inch in diameter with a curve at one end, it looked like a twisty letter J. I thought it might work for a pen...so I picked it up. The smaller end had broken diagonally, and the pith was dry enough to be scraped out gently with my smallest fingernail. It already looked like a viable writing utensil, but it wasn't until I got home later that evening and shaped the ends with a penknife that I discovered what a find I'd made! In the picture below, you see my initial attempts with the cartridge pen on the left, and the super successful reed pen on the right. Shapes vs. words! The kitties were very impressed. I plan to refine my reed pen a little more to make it longer-lasting. After several phrases and more than a few dunks into the ink, it softened enough that I noticed a change in its writing precision. My goal is to use plant ink in my herbal labeling, so anything I write with should last for more than a few labels at a time.
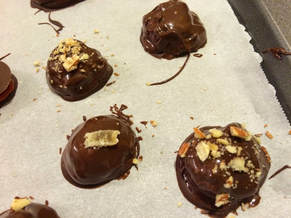
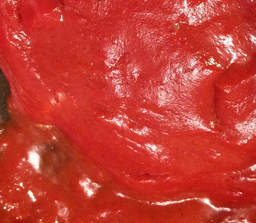
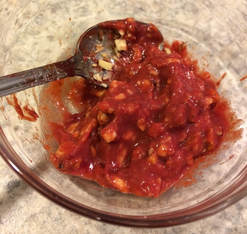
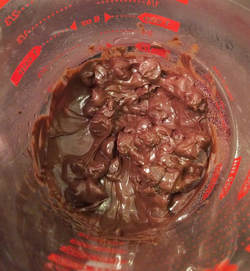
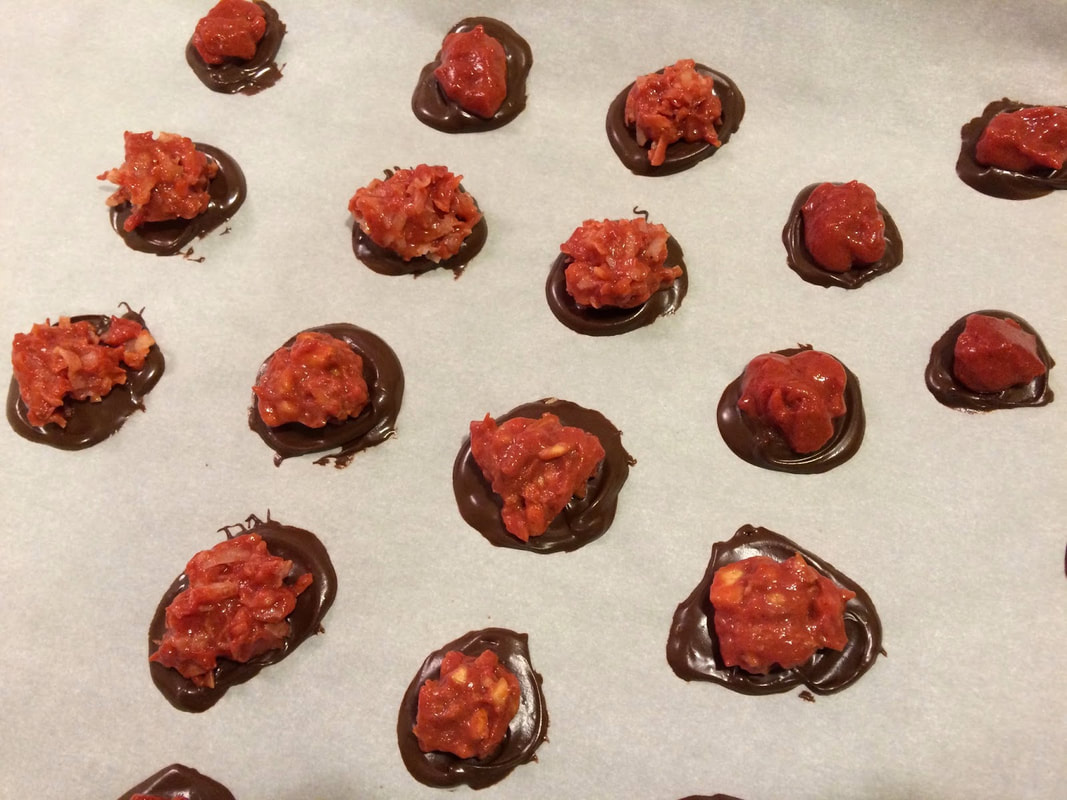
More investigations into unconventional pens and inks to follow, as well as a report on the vintage ink pen that should be arriving by mail shortly. Thanks for reading! Recipe: Autumn Olive Berry ChocolatesFrom the archives! Originally posted February 2015. These are basically jelly-filled chocolates, with puree I made up myself using locally foraged autumn olive berries. You can use any kind of berry you'd like for the puree or filling. Feel free to use jam you already have made up! Part 1: Puree Filling -Cook berries on low heat, with a little bit of water so they don't burn. Stir frequently while mashing berries with a wooden spoon or fork. -Use a strainer or food mill to separate pulp and seeds, creating puree. -Return puree to saucepan. -On medium heat, add honey and/or sugar to taste -Add cinnamon, plus dashes of ginger, clove, vanilla and almond extracts, to taste. Add a dash of salt. Stir well. Taste again to make sure you think the puree is delicious. -Add pectin according to the directions on the box. I like Pomona's Universal Pectin because I can sweeten with other things than just sugar. -Bring puree to a boil while stirring constantly. Boil for about one minute. -Remove from heat and set aside to cool and gel. -Mix fillings of your choice into puree. I kept each filling combo in a separate bowl. Some ideas are: crushed nuts, coconut, cacao nibs, ginger, etc. -Set filling aside. Step 2: Chocolate and Assembly -Melt the chocolate of your choice in a double boiler, on medium heat. (A note on chocolate: I used Toll House semi-sweet morsels, because that is what was in the cupboard. I think Ghirardelli dark chocolate morsels would be really good too.) -With a spoon, dot chocolate in rows on a parchment paper-covered cookie sheet. Smooth each dot to make a circle. This is the base of the chocolate. -Chill the chocolate briefly in fridge or freezer to harden. -Top each chocolate base with a small spoonful of filling. -Go back to your double boiler and melt another 1/4 cup of chocolate morsels. Add maybe 1/8 teaspoon of coconut oil to thin the chocolate a little, just enough to make it easier to work with. -Top each chocolate with melted chocolate. You can dip them into the melted chocolate, drizzle the melted chocolate using a spoon, pour it on...I don't really have a good technique for this part. I ended up using a spoon to drizzle the melted chocolate, then spread it over the filling with the back of the spoon. Kind of like painting in chocolate. -Sprinkle with toppings as you go, if you like, while the chocolate is still warm. In this batch, the sprinkles are a clue as to what's inside - coconut sprinkles with autumn olive puree + coconut, etc. Store in an airtight container in a cool place for up to a couple weeks - if they last that long!
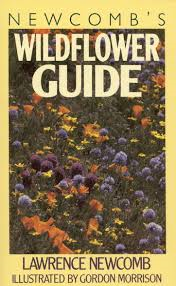
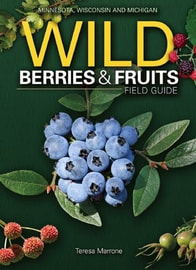
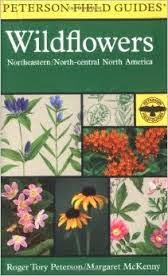
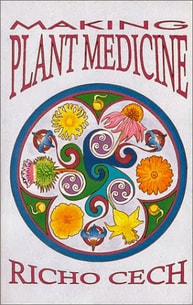
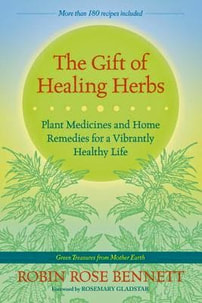
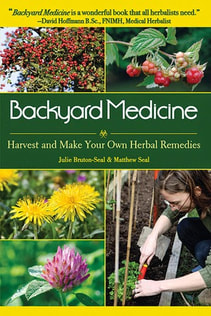
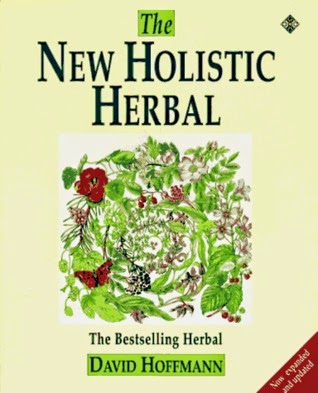
For Your Reference: From the archives! Originally posted November 2014. In my first herbal medicine classes, we were required to have access to at least four herbal reference books and at least two good field guides for plant identification. That's what I started out with, anyway. I think by now my plant books have overgrown one of my three-shelf bookcases. They're all over the living room, on side tables and coffee tables; in the bedroom on bedside tables and bookcases, in the basement and the office and the kitchen. I have books on identifying (plants, flowers, trees and berries) in all seasons, making medicine, herbal theory and practice, herbals of all kinds, recipe books for wild edibles... Not all plant books are the same, of course. There are multiple traditions and paradigms within herbal medicine, and my chosen path is best described as bioregional folk herbalism. In other words, I use the plants that grow around where I live (my bioregion) in accessible ways, guided by traditional uses and herbalists. Therefore, you will find that many of my plant identification and ethnobotany references are specific to the Great Lakes, Michigan in particular. Here are several of my most often used reference books for plant identification. These tend to live in my wildcrafting backpack: And a selection of herbals from herbalists and plant people that I respect. I own all these because I refer to them so much. These friends are to be found all over the house, along with plant books I've checked out from the library. As I am a book person, I have and use plenty of books. Like I've said, they're everywhere. I like to pick one up and flip through when I'm looking for something in particular, or just open to a page and start to read. I get a lot of information and ideas from books, however it's important to be said that books are not my only references. Since so many of the best herbalists I know spend their time helping people, wildcrafting, making medicine and teaching, a more accessible way to learn from them is by what they've written and/or posted online. Speaking from experience, it's so easy to put information the internet! You can find a wealth of information by searching the name of an herbalist you trust, or going to their site directly and poking around. My trusted herbal reference sites include: jim mcdonald: www.herbcraft.org Kiva Rose: The Medicine Woman's Roots 7Song: Northeast School of Botanical Medicine Rosalee de la Foret: Methow Valley Herbs Ananda Lakshmi Wilson: Plant Journeys Juliet Blankespoor: Blog Castanea / Chestnut School of Herbal Medicine Michael Moore: Southwest School of Botanical Medicine Henriette Kress: Henriette's Herbal Homepage For botany and plant identification, I frequent: Ontario Wildflowers U.S. Wildflowers USDA Plants Database Lady Bird Johnson Wildlife Center - Native Plants Database Michigan Wildflowers Index Per's Wildflower Pictures of Michigan and Ontario Michigan Flora - University of Michigan Herbarium I'll leave you with one of my new favorite things - the recordings, talks and plant walks that you can find on Youtube, Pinterest and the like. A version of distance learning, you could say, to watch herbalists from around the country. Here's a great example - a short video of jim mcdonald, talking about New England Aster. This is found on Youtube, posted by jim. I've noticed some technical difficulties with this post, so if the video link does not load for you, this and more of jim's videos can be found in his Youtube playlist here. |
Author
Herbalist plant ramblings and adventures in green medicine, by Linden Tree Herbals potion-maker Ginny. CategoriesArchives |
| Linden Tree Herbals | . |
Proudly powered by Weebly

 RSS Feed